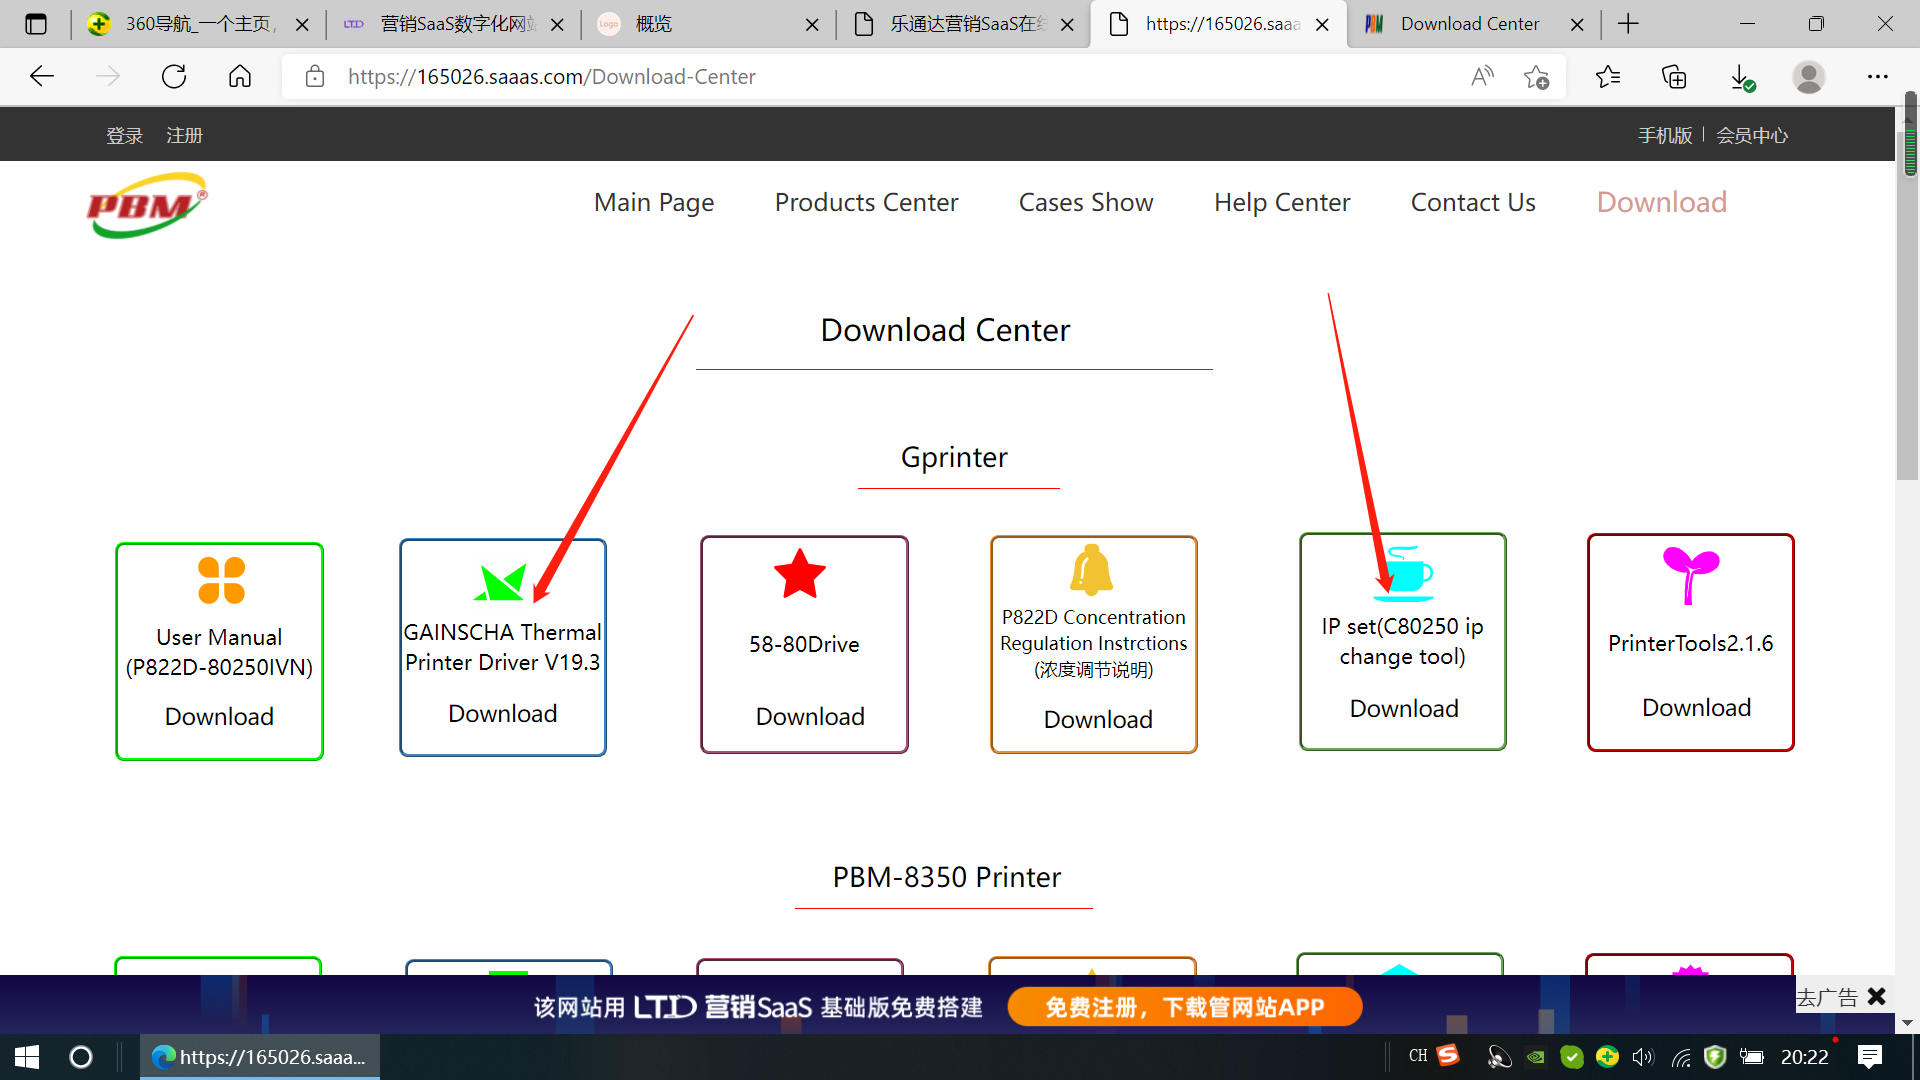
1. Open website www.pbmpos.comand Download the two files in "Download Center":
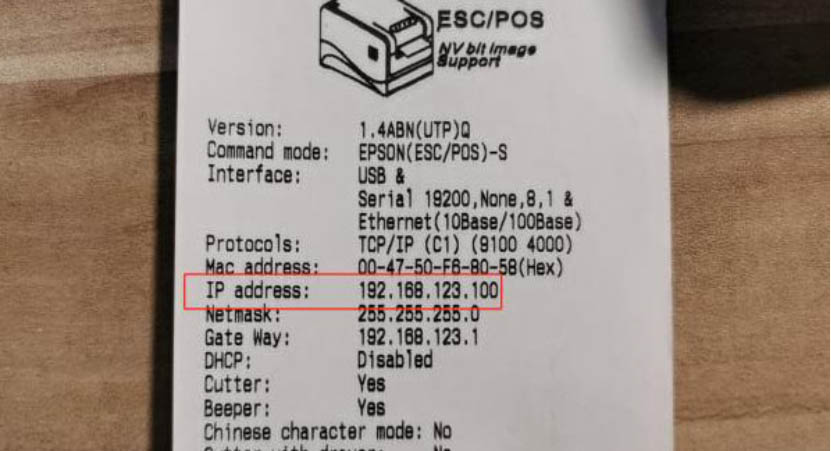
2. The printer came with a printed paper with preset IP address: 192.168.123.100
3. Connect the printer to the LAN port of the router with a RJ45 wire. 4, Modify the POS PC segment to 123 to find the IP printer on the LAN.
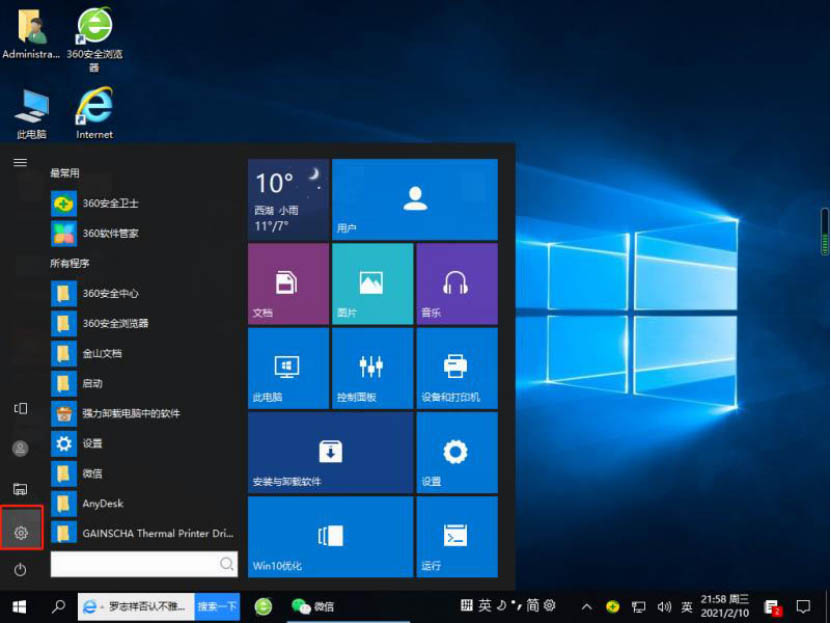
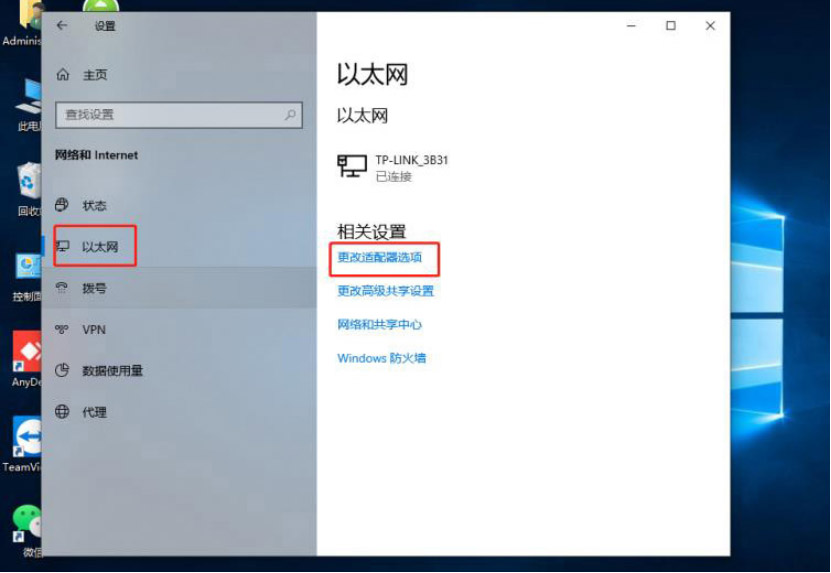
5. Enter the computer Settings
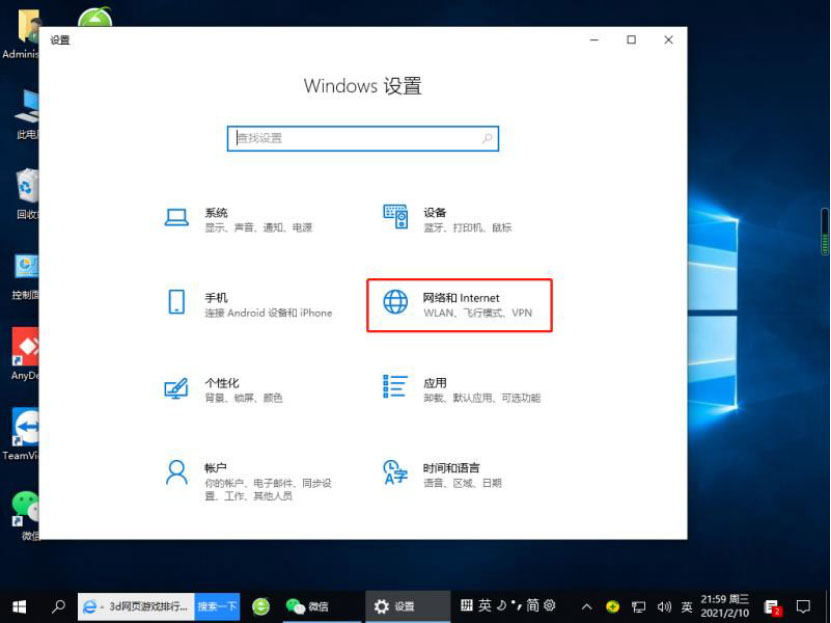
6. Click "Network and Internet."
7. Select “Ethernet”, then click “Change Adapter Options".
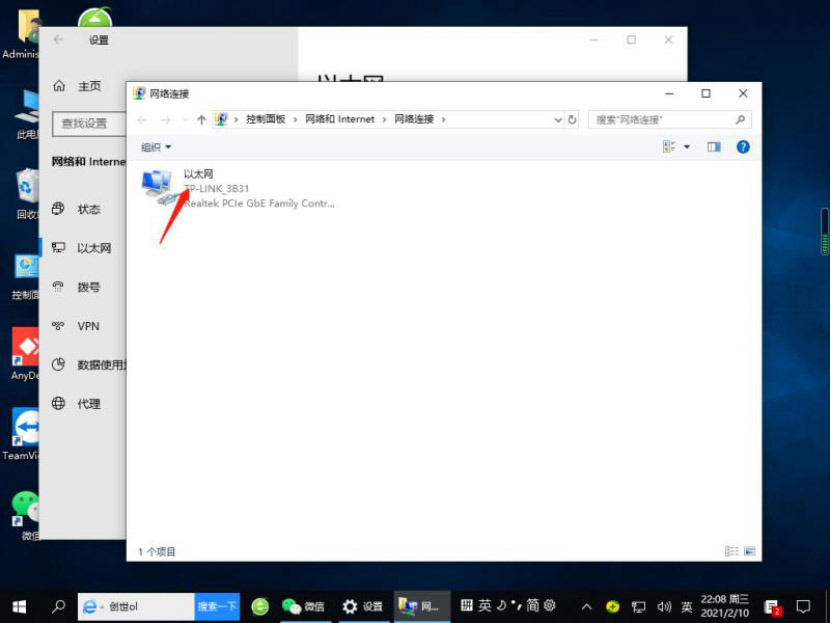
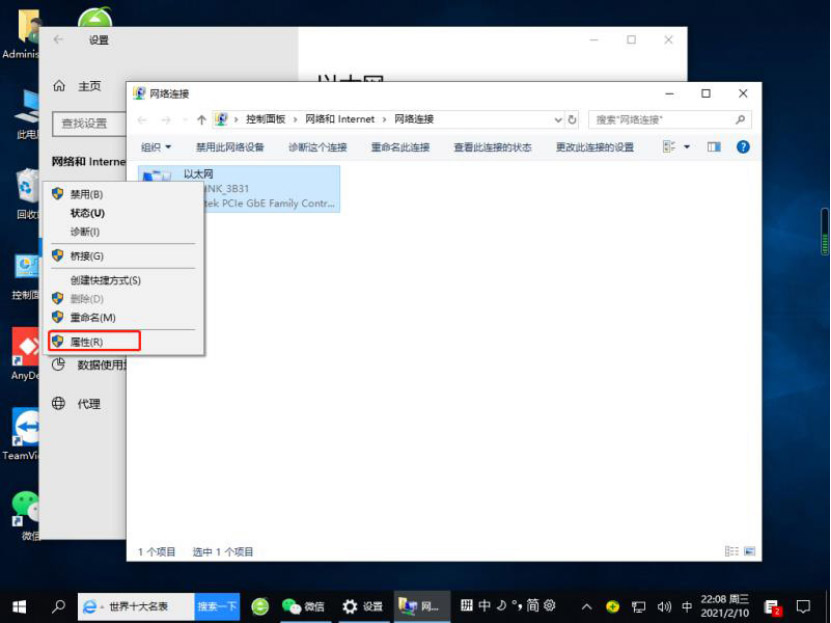
8. Right-click the Ethernet icon.
9. Click “Properties”.
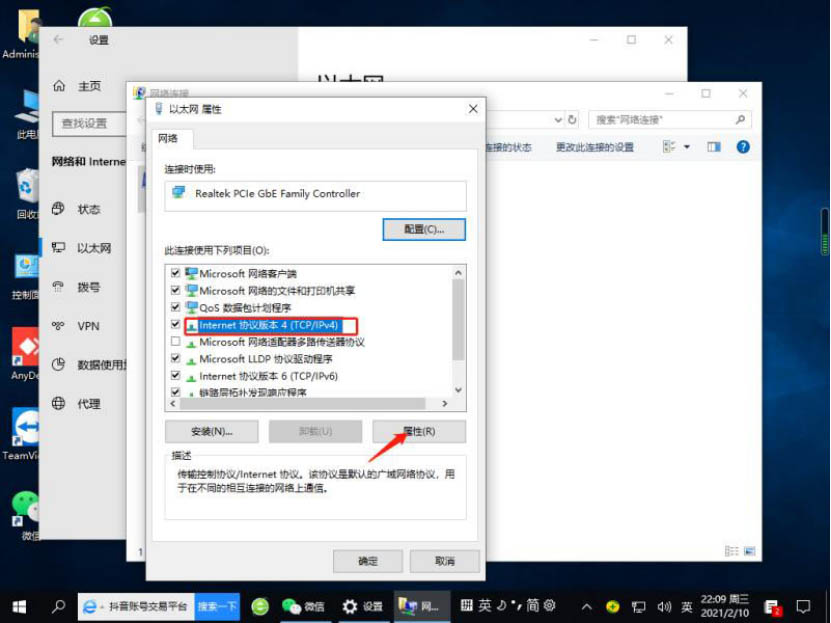
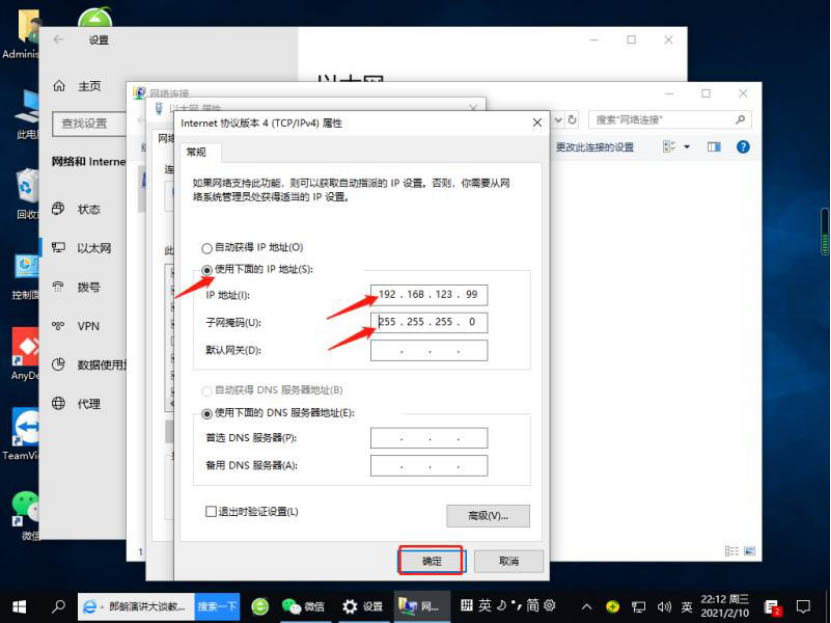
10. Select "TCP/IPv4" and click "Properties".
11. Click "Use the following IP address", type 192.168.123.99 in the IP address field, the subnet mask will be automatically filled in, then click "OK", the network segment of the machine is changed to 123.
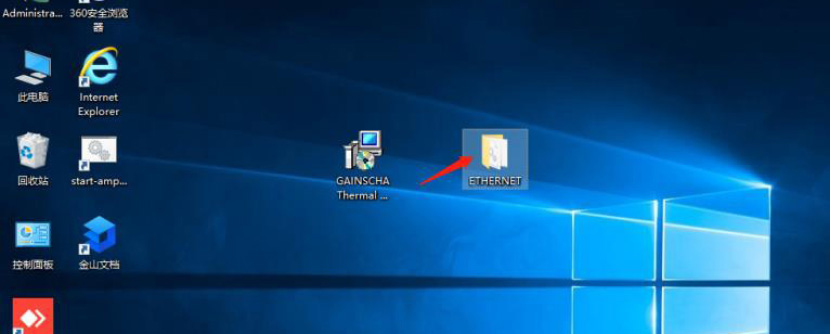
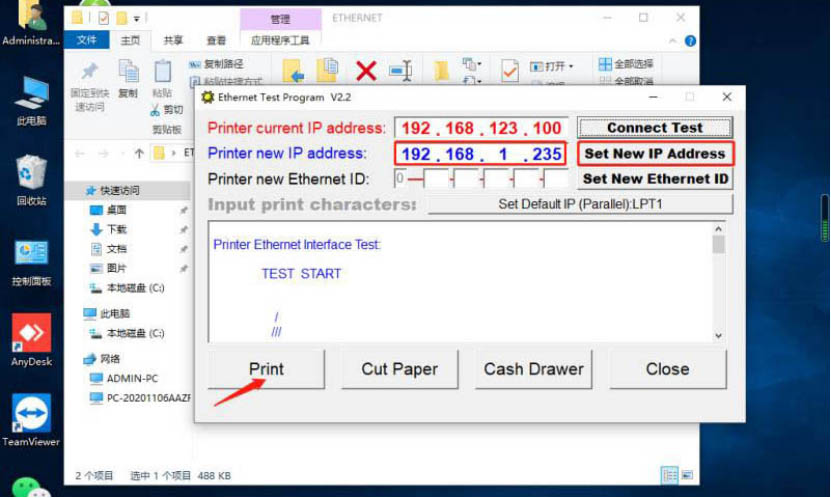
12. Now change the printer's default network segment to the current LAN segment 1.Click on the tool "ETHENET".
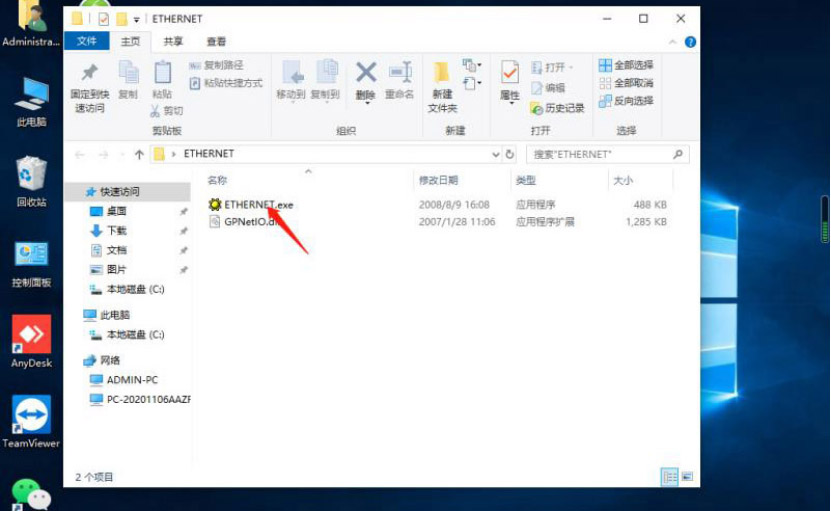
13. Double click to open it.
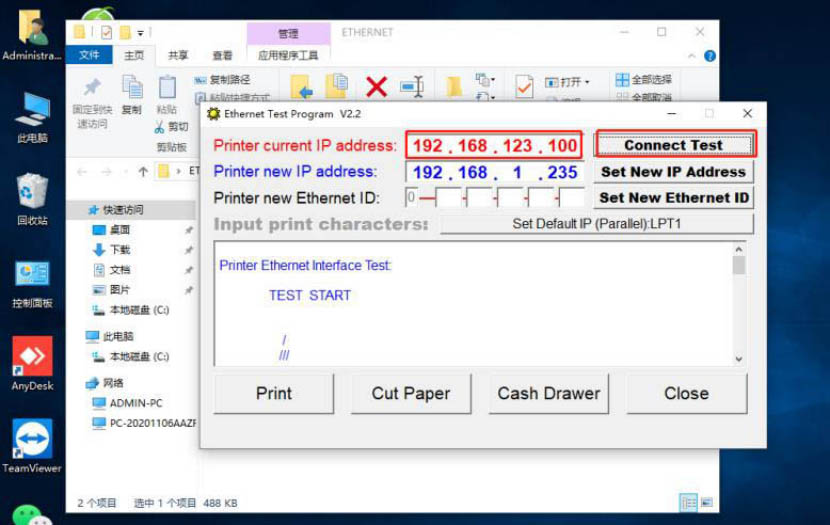
14. Type in the default IP of the printer in the position above: 192.168.123.100, click "Connect Test", and the printer will beep, indicating that the printer is connected successfully.
15. Then type the New printer IP Address in the above box, such as 192.168.1.235. Click "Set New IP Address". The printer's IP Address will be changed to the current network segment address.
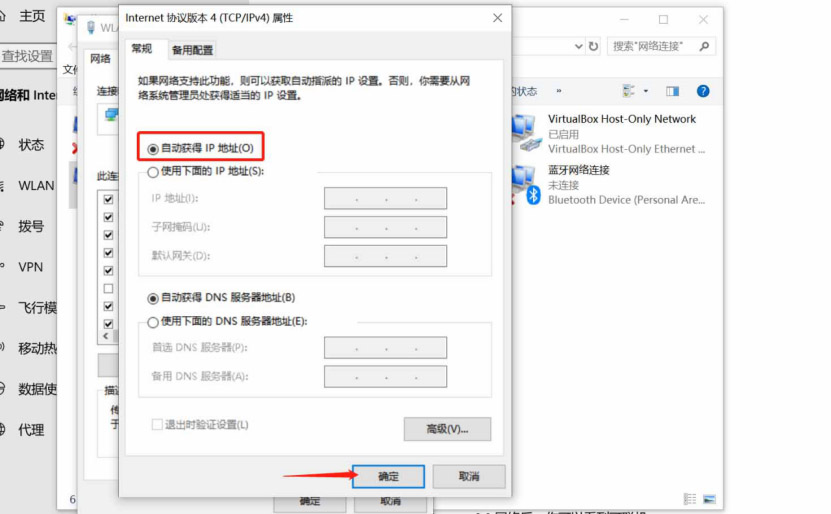
16. Reenter PC "Settings" > "network and Internet" > "Ethernet" > "change adapter options" > right click on the "Ethernet" icon > click on the "ICP/IPv4" > click "properties".
17. Select "Automatic access to IP address >click"OK". Now the PC is returned to the original network segment 1.
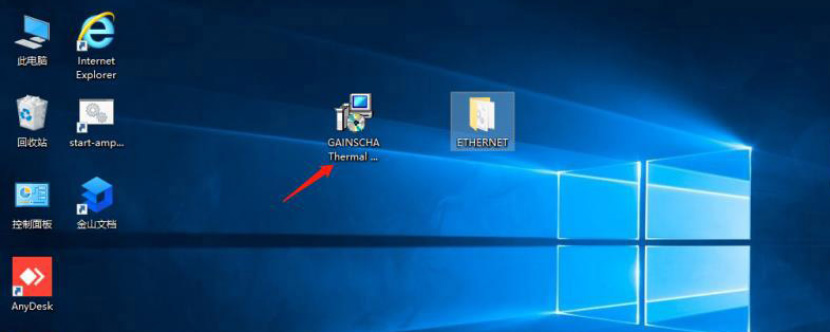
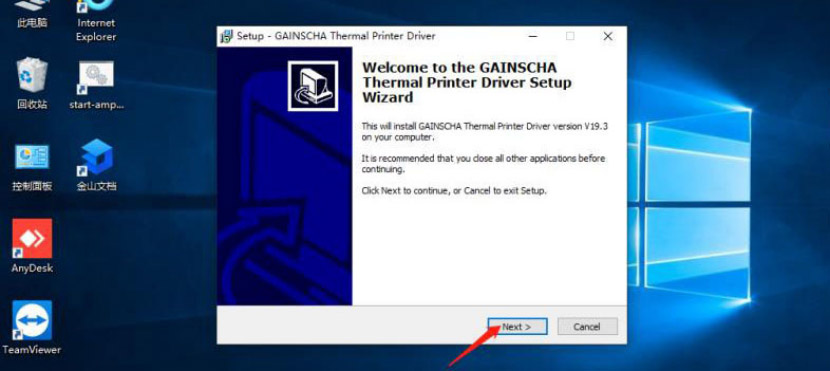
18. To start installing the driver, double-click the downloaded driver icon as shown in the figure.
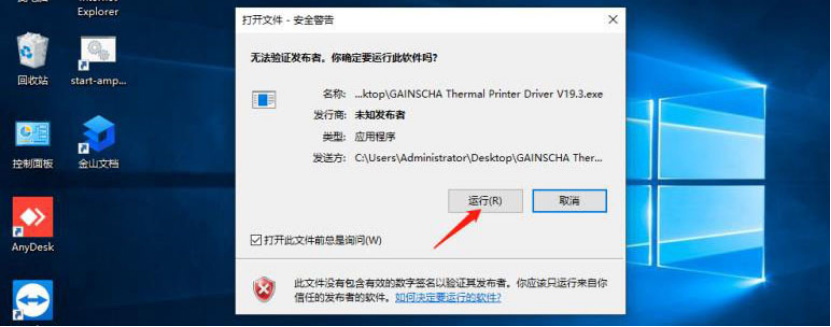
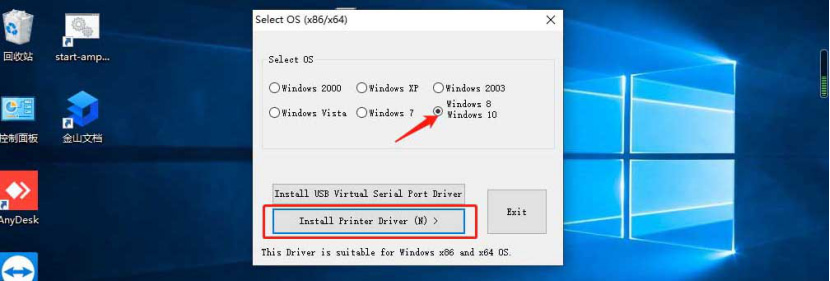
19. Operate.
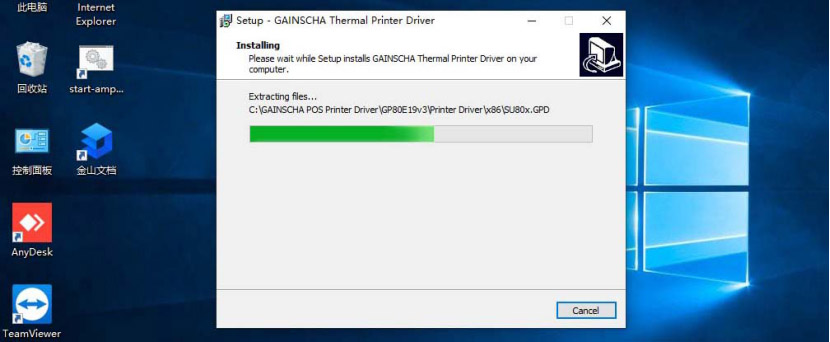
20. Next.
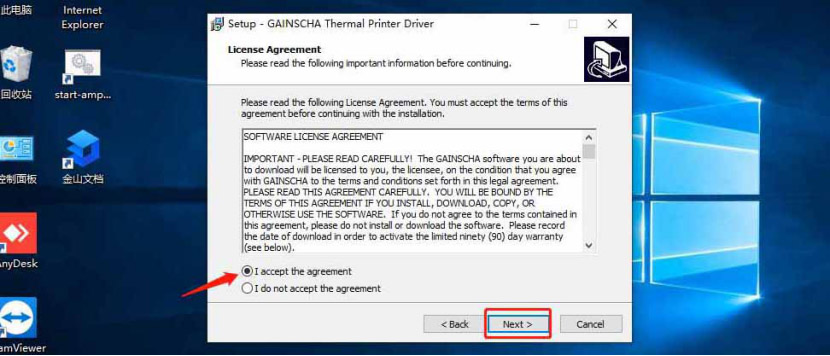
21. Choose “I accept the agreement”, then click “Next”.
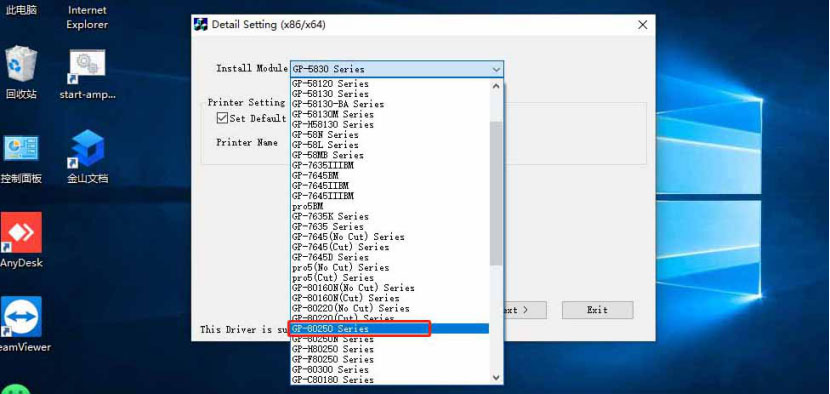
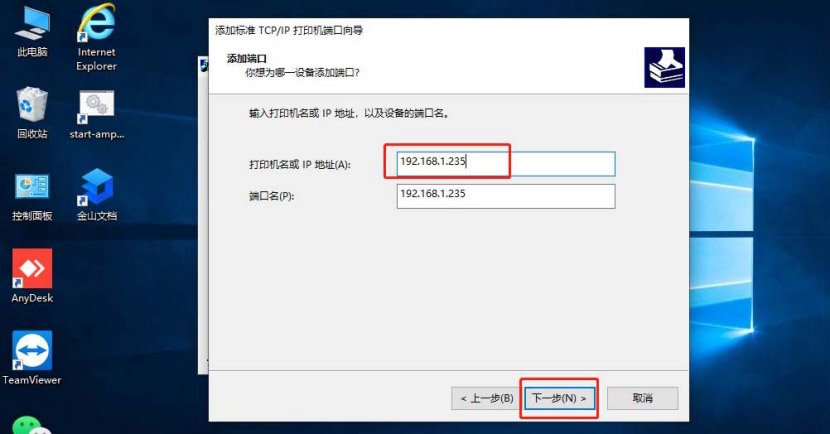
25. In the open IP address bar, enter the new address of the network segment printer: 192.168.1.235, and click "Next".
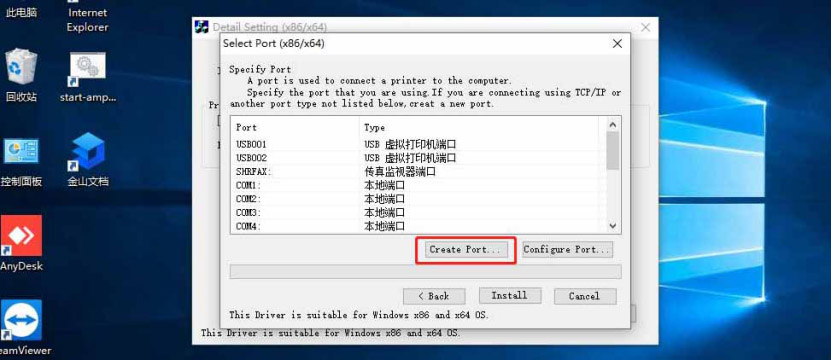
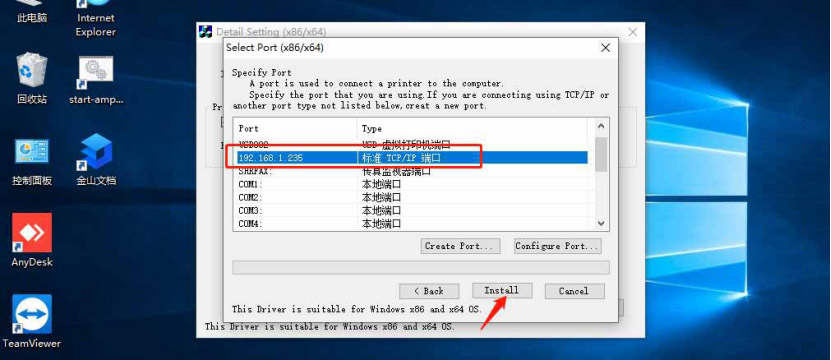
26. Find for a LAN Port in the "Select Port" box that appears. If not has, Select "Creat Port..".
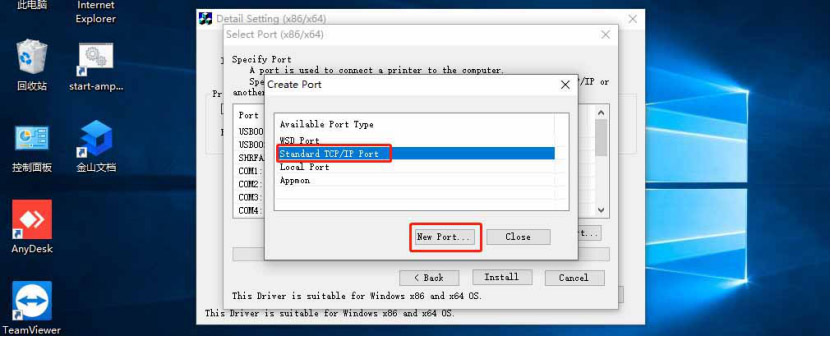
27、Choose "Standard TCP/IP Port" and click "New Port...".
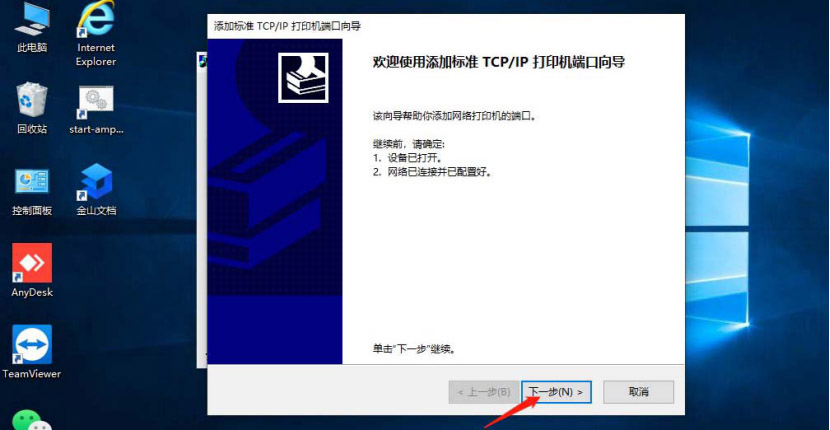
28、Next.
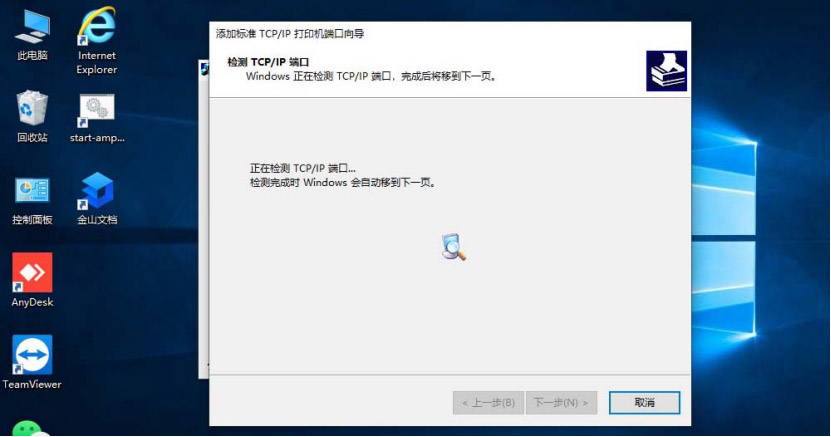
29、Enter the new IP address for the printer: 192.168.1.235, and then click Next.
30、The PC is testing printer port.
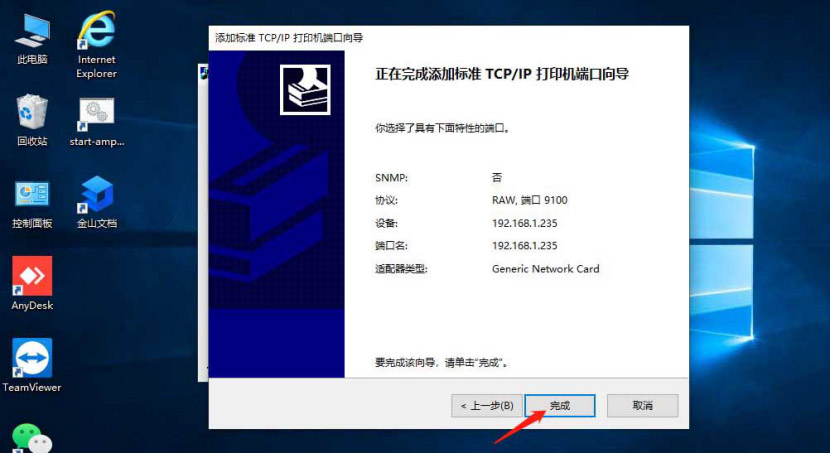
31、PC found the printer port, click “Next”.
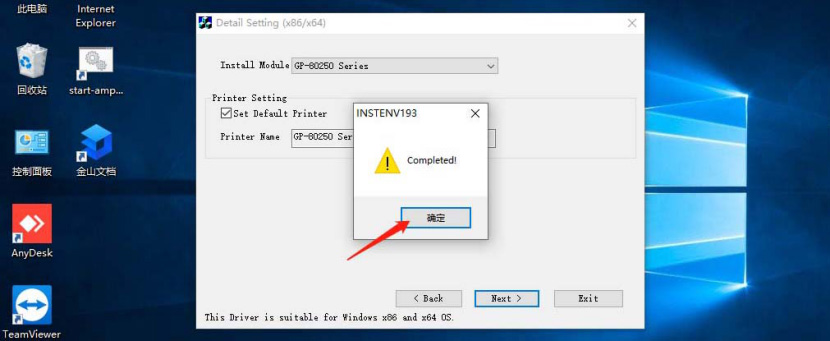
32、Installation complete.
33、If you still cannot find the IP printer in the "Devices and Printers" section of your computer, reinstall the driver, Select "Standard TCP/IP Port" in the "Select Port" window, and click "Install".
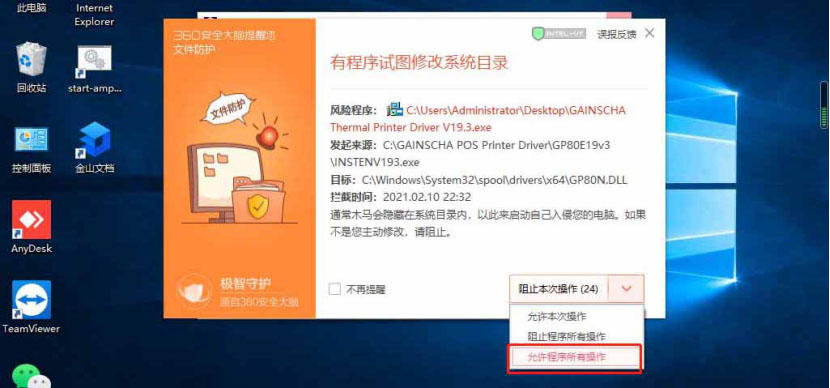
34、Antivirus software intercept, select "allow all program operations".
35、Installation complete.
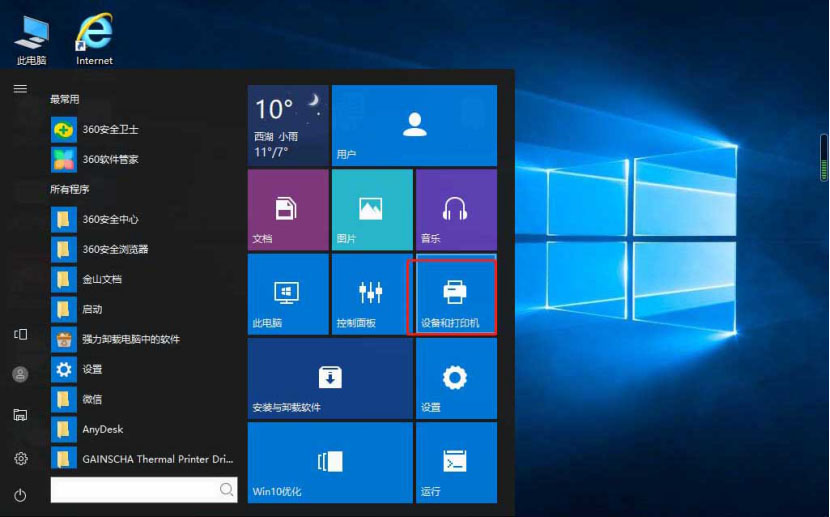
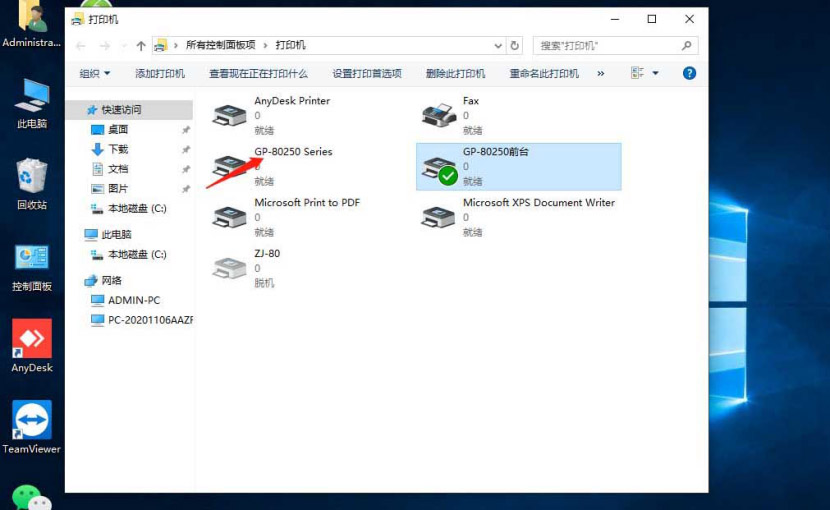
36、To check if the installation was successful, "Start" > "Device and Printer". As you can see, the IP printer has been set up successfully.
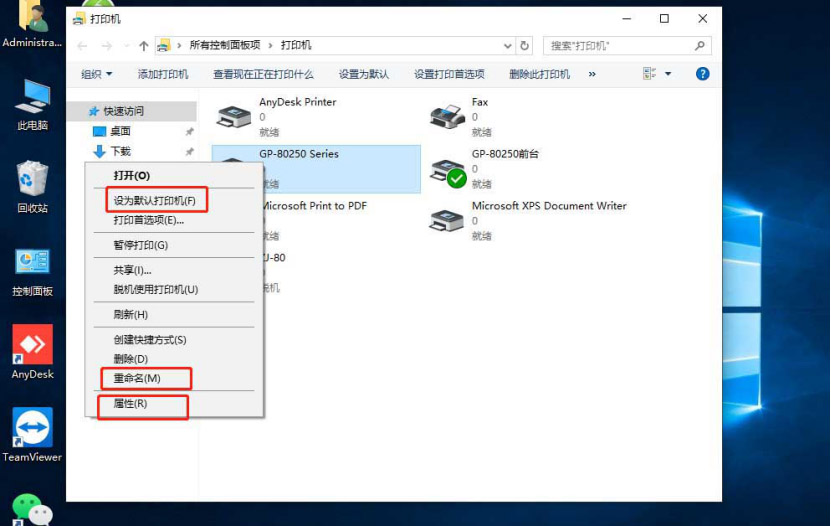
37、Right-click the IP printer icon to select "Set as Default", "Rename", etc.
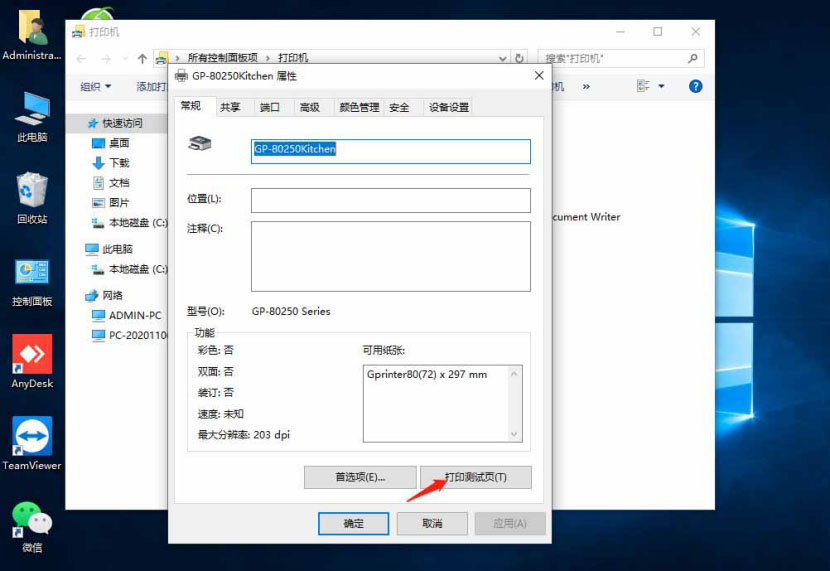
38、Click Properties to Print Test Page.
Disclaimer: This site some information, pictures from the network and contributor, if there is infringement please contact customer service, we will deal with as soon as possible!